
HostDime’s latest line of bare metal servers by Supermicro feature Intelligent Platform Management Interface (IPMI) so your server can be managed remotely from anywhere in the world. IPMI is included at no additional charge.
One of the most asked about features is the ability to install your own OS directly through CORE, without any interaction with our support staff. Below are the steps required to perform an OS installation through IPMI. Best of all, there’s no need to contact our server technicians to perform any IPMI action.
How to Install OS with IPMI in 6 Easy Steps
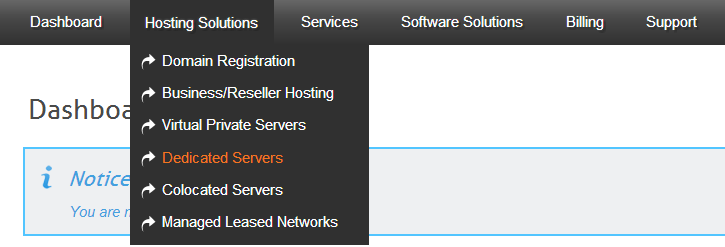
1. After you have logged into your CORE account, select “Dedicated Servers” from the navigation.
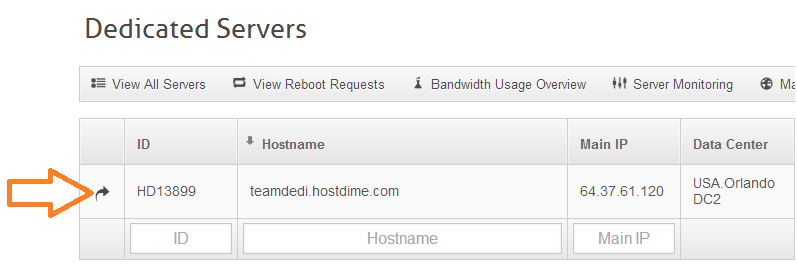
2. Click the black arrow to the left of your dedicated server’s HD number.
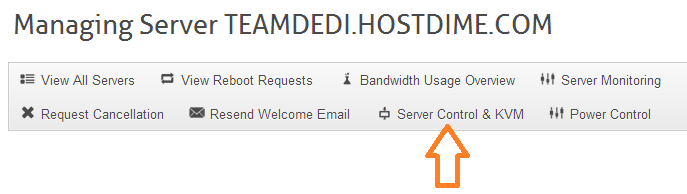
3. Click the “Server Control & KVM” option.
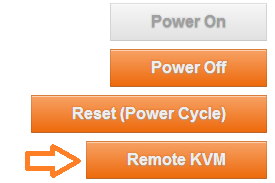
4. Select “Remote KVM” from the list on the far right.
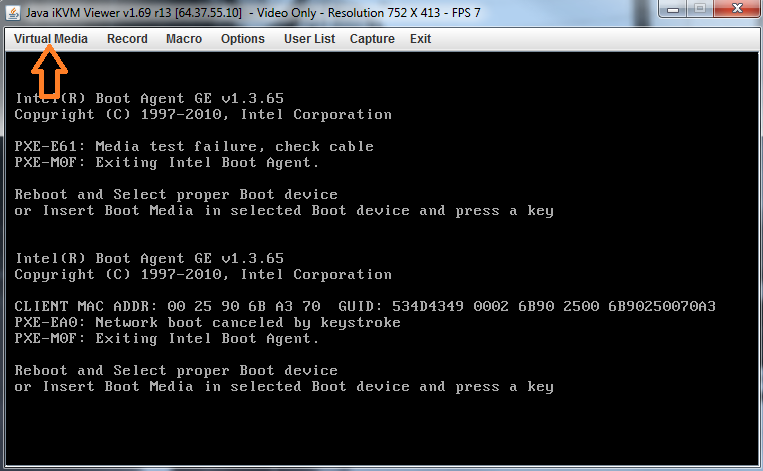
5. A java file will then be downloaded to your computer with the name “HD#####_vnc.jnlp” (this would be your actual HD server number). Double click on the file to launch it. Once the Java windows is open, select ‘Virtual Media’ from the toolbar.
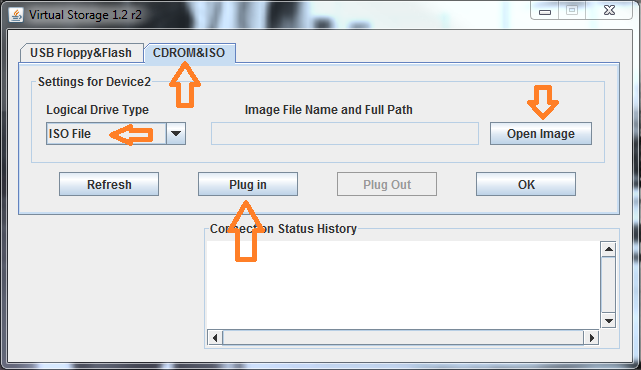
6. Click the “CDROM&ISO” tab, then choose “ISO File” from the Logical Drive Type drop down menu. Then click “Open Image” on the right hand side and select the .iso file from your local computer. Once you’ve selected the ISO, click “Plug in”.
The ISO should now be loaded onto your server. Simply place a reboot request within your CORE panel, then proceed with the OS installation once the server is back online. If for some reason the server does not boot the ISO, you will need to access the BIOS and change the boot sequence to CDROM.
If you have any questions, please feel free to open a live chat or ticket in CORE.
[divider]
Jared Smith is HostDime’s SEO & Content Strategist.